Sunday, December 4, 2011

2nd Green Snow Flurry Card

This is the Third one of the Snow Flurry stamps set from Sweet & Sassy. This is the last one for a while of the glue and New England Ivy reinker. This is the other die cut I got from Sweet & Sassy. On the snow flake this time I used half pearls. I used tiny ones on the tiny flakes. The inside of the card says "Snowflaeds of one of nature's most fragile things., but just look at what they do when they stick together."

Today I started some new cards. This time I tryed this technique the way it's suppose to be and I don't really like how it turned out, but I'll be using it anyway.

Last night my husband and I went to a dinner/auction for a friend of ours that has Cancer. I'm always amazed at the turn out for these things and the generosity of the community for donations. This one was no different. Of course we ended up spending more than we should have, but I got a beautiful Pink Ice Diamond Black Hills gold ring. I'd tried it on and for once it fit. I started to bid on it, then got chicken, so my husband went $20 more than my bid and got it. I'm very excited, Merry Christmas to me. Anyway back to what I was saying. We raised $8700 plus for this family. She hasn't been doing well and worries alot, so I know this will help with all the Medical bills. In this day and economy I'm so proud of people donating to others. Makes my heart feel good to give.

Now talking about giving, if you happen to by a Giving Tree pick a name. Some little kid would love for Santa to visit. I picked mine for this year. It's really quite fun buying for someone you don't know. We did this last year and felt real good about our Christmas.

Until next time,
Hugs,
Bobbi

Saturday, December 3, 2011

#2 of the Snow Flurrys


Here it is the second card I made using the Snow Flurries card and the die cut from Sweet & Sassy. The stamp is just stamped with New England Ivy ink from Close to My Heart. I glued clear cut rhinestones in the center of the snowflakes. On the ribbon die cut I ran silver ribbon through it. This card is so simple yet looks very elegant.


I haven't yet gotten into the Christmas spirit, but will soon. Have 10 Christmas cards made, still need a bunch. I hate to buy them. Need to go through my boxes and see if I have any left overs. That way I'll get an idea how many more I'll need. Don't forget when your making you card, you can also decorate the envelope. On the snowflake cards I put a small snowflake on the envelope. Also if your cards a bigger than the normal size you'll need extra postage. When mailing gifts sometimes using the post office boxes and evelopes are cheaper than your own boxes. I can cram alot in a $11.95 box.


Enjoy your day, hit as many Bazaars as you can. Remember if you see something you like don't say, "Oh! I can make that". Just buy one you'll never get a round to making it.

Hugs,

Bobbi

Thursday, December 1, 2011

My New Favorite Stamp

Your not going to believe this stamp. I saw it on a blog hop and fell in love with it. I'm not a big fan of winter, but this snowflake stamp takes the cake, for all time beautiful. I really hope everyone likes the cards I did with it. Most are totally different from what I usually do. The first one is totally not in Christmas colors, it started out to be Holiday Red from Close to My Heart, but I'm not sure what happened. The technique is Elmers glue pounced on cardstock, then a few drops of Holiday Red with some Platium Silver. For some reason it separated and became oily. I used a heat gun to dry it, which didn't work so I used a paper towel to dry it off. This is the background, we had a hard time getting the tape to stick. The stamp is from Sweet & Sassy and called "Snow Flurry". It turned out kind of orange and yellow, so that's the color of paper and ink I used. Not quite Christmas colors but I like it. The white brad worked real will the the spot that didn't have ink on them. When you see the other card I made with this stamp you'll see why I love it. It can be as elegant as you want it or like this card, just kinda plain. I have 2 more cards I'll share tomorrow with the same background technique only done differently.


Until then, take care and stay warm.

Hugs,

Bobbi

Wednesday, November 30, 2011

New Share

Bet you all thought I quit making anything. I did make some stuff, just been busy with school and visiting for Thanksgiving.

Before we left I made this card for a technique swap I was in. The lace is called double ruffle and was made with a new die cut from Sweet & Sassy Stamps. Not sure you can see it, but there are two ruffles, the bottom one is purple. The stamps are from a retired set from Close to My Heart. The placement of the horn is out of the box ( because it's not inside the backing). The "Give Thanks" is done with thin silver tread, it's call Sprilli. The edges are sponged with ink. I really love doing the Sprilli, makes things look fancy.

For Thanksgiving we went to my brothers and sister-in-laws in Nevada. Had a wonderful dinner with some of their friends. Kim and I made 4 pies for the dinner. She tried a recipe for pumpkin pie she found in a magazine. It was made with Bailey's (she used Carolines). Made the filling richer than the regular pumpkin pie, was very good. I did a Mincemeat pie and Apple. Some of the guests had never had meat in their mince and was surprised at the flavor. My little sister-in-law is great for trying new recipes, she also made a delicious stuffing. It had sausage, peppers and a bunch of stuff I don't normally put in stuffing, was very yummy. My brother did the turkey on the rotisserie, was very moist. We had a wonderful time while we were there, we always do. Kim and I made Christmas cards, so I'll be posting some of the ones I made along with a technique we did. Not sure if it has a name but it turned out pretty cool. I'm going to try it the right way and see if I like it better.

Until I post again, hugs,
Bobbi

Monday, October 31, 2011

Happy Halloween

It's Trick or Treat Day, wonder if we'll get any treaters. I used to love it when we lived in town and I could decorate and have the little guys come. It's been almost 30 years since I moved to the sticks, now town is coming to us. The only ones that Trick or Treat us are the great nephew and grandson. We have a neighbor girl now wonder if she'll make her way over or if she's to old for that.


Here's my card for today. Made this for my card making buddy, Yara. We do a one on one swap, with different people, she was my person this month. The layers are a stripped designer paper from one of my old discontinued packs. Then is Smokey Plum and Sunflower. Everything on this card is Close to My Heart. The stamp is from a set called Thriller, it was last years September Stamp of the Month. I stamped in embossing ink and used black embossing powder on him and the words. The brads at the top are black also. The words say "Happy Hauntings!". The whole set is scrolly, very cute. I got it on the scanner a little crooked. Cute, easy card.


Chuck and I did up 20 apple pie fillings during the Seahawk game yesterday. It kept him from throwing something at the tv. Not sure why he keeps picking them to win. The one time he didn't they won. Just glad we got the apples done. Now I need to pick some to eat. They are so good, their called Honey Crisp, you can't find a juicier apple.

Until later, no tricking tonight, just hand out goodies and enjoy the little kids in their costumes.

Hugs,

Bobbi

Sunday, October 30, 2011

Card #6 Last of this swap

Good Morning, It's going to be a great day, can feel it in my bones. We finished up 2 of Patty's projects yesterday and have one to go. They are posted on my facebook page. Since it's back to school tomorrow I have to do the Walmart thing. Have to make a stop at Home Depot too. Thinking about going to Safeway they have a 2 for one sale in the meat department. Then get to defrost the fridge, didn't get that done and it's bad.


On to today's share, it was a pretty easy card to do. Sunflower are wonderful for fall cards and I have a single sunflower stamp but nothing like this. I used markers again. Seems to be my favorite way of coloring. All the markers I use are Close to my Heart. The leaves were done with Pear and Olive. The flower pedals were done with Sunflower and Autumn Terricotta. I looked at the center and decided to use Desert Sand and Chocolate. The behind the flowers looked like fencing so that's what I went with. It's colored with the Chocolate and trimmed with the Terricotta. The layout is called "Out of the box" from the Technique Junkies Newletter. (I get one every 2 months). The background layers are Chocolate, Olive and Sunflower. The 3 brads at the top are Chocolate. The center of the flower is colored with Brown Stickles. Everything is hand cut.


This is the end of my part of the swap. I'll be getting my cards back soon, the image I sent was kind of funky. It was a brand new stamp and I had no clue what to do with it. I'll share the image later. Tomorrow is Halloween, so I'll be sharing a card I made for a one on one swap for Halloween. I hope you enjoyed this swap, it was alot of fun. Until tomorrow have a fun Sunday. Relax and enjoy the day.

Hugs,

Bobbi

Saturday, October 29, 2011

Card # 5

And a nice frosty morning to you all. It's a balmy 26 degrees outside. I'm so glad the furnace works. Fall looks to be here to stay, with no Indian Summer. The weather is crazy here, you go from one extreme to the other. Hot, hot to cold, cold.

I really like this card and it was super easy to do. Here's the image. The first thing I thought of when I saw this was the prairie. Wagons are brown, right? So I colored it with 2 browns, Chocolate & Desert Sand. The grass was done in Topiery. All CTMH marker colors. I then cut it out by hand, the spokes had to be cut with a cutting knife. Let me tell you that wasn't easy. The background is all done with a sponge. There's purple, pink, orange, blue and green all sponged on. The layering is Topiery, then Chocolate. In the corner are Chocolate brown brads. I think it's pretty cool, probably could have used some yellow in the green to make it look more like the prairie.


Today is going to be a short post. Have to help Chuck finish up his project for Patty. I'll post pictures on facebook of what he's been making as soon as this ones finished. He's done a beautiful job. They go to her shop this morning to be set up.


Until tomorrow, keep warm and have a wonderful day.

Hugs,

Bobbi

Friday, October 28, 2011

Card #4

Kind of dreary out today. Good day to stay in and do some baking. I have a recipe I want to try for Jalapeneo Bread. Hope it turns out as good as it sounds. Have a bunch of apples to peel and slice for pies too. Also need to defrost the fridge. Maybe I'll get one or two of them done, but not if I stay on the computer.


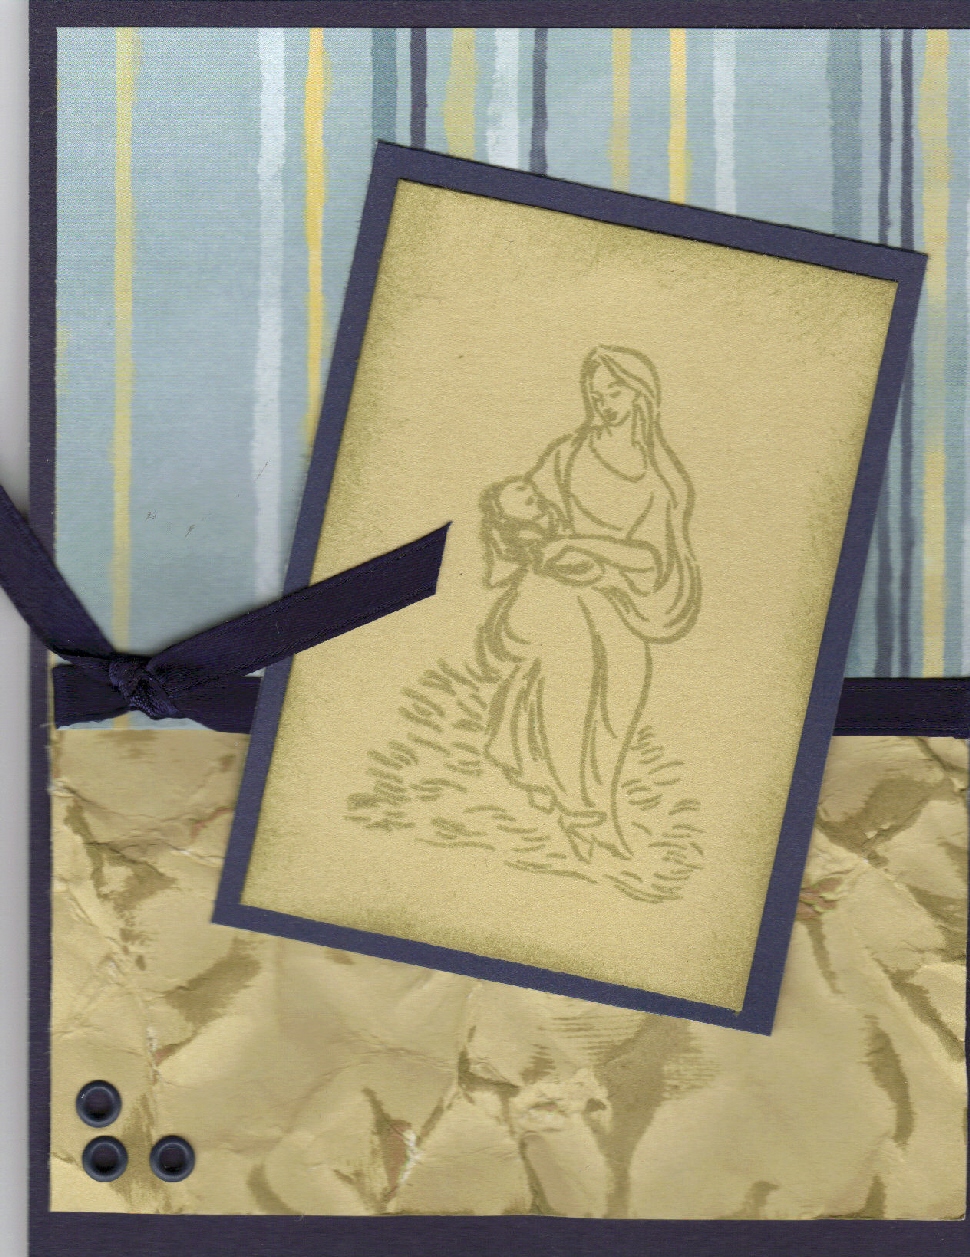
Here's todays image. It reminds me of the 70's, with all the hair and ribbons. Kind of think she and the cat look alike. The card I did is done on Pear cardstock (CTMH). It's a tri-fold card. I had to practice of course, a couple times to get it figured out. It really isn't hard to do, just to figure out the folds. You need to have a cutting knife for the center part. The picture was colored with markers. This is a picture of it open. It's about 8 inches long. You can see the fold lines. I random stamp the cardstock with leaves to match the ones in the image. It had to be stamped on both sides of where the image is. I put a friends stamp on the back. (Can't find the stamp set right now to let you know what it is). The last picture is of the folded card. It will fit in a regular card envelope. It will also stand by it's self. Instead of an image you could put a small school picture in and decorate it as a gift.


This is my big share for today. It's back to work on Monday, so have some shopping to do today to get ready. If anyone has any great ideas for classes for the kido's send me a comment. We've done Ocean Life, Bugs and Planets. Have a class on Dinosaurs this next go round, but need some more. The kids always fill the cooking class.


Until the marrow. Take care and enjoy your day.

Hugs,

Bobbi

Thursday, October 27, 2011

Card #3


Things got a little busy the last couple of days. Have things kind of under control now, so can start posting again. Been thinking alot about starting my Christmas cards, I know we haven't had Halloween yet. If I don't get started it won't get done.


On with todays share. Isn't this the cutest image. I don't have a dog, but would take this one in a minute. Not really a cat is enough. My first thought when I saw it was to put it on a plaid background. Sooo, I tried making my own, I'd seen it in one of my Technique Junkie pamphlets, but couldn't find which one, so being me I thought what the heck it can't be that hard. Ya, right! What a mess I made on 2 piece of glossy paper. Now that I've done the card I bought a CD from Technique Junkies and the first tutorial I looked at was the plaid. It wasn't hard if I'd have known what I was doing. Oh well, I have a pretty neat back ground behind it.

The background used is distressed paper. You take a piece of cardstock (I used white), lightly spray with water and crumple up, be careful not to tear it. Oh! cut it a little bigger than your going to need. Now flatten it out and take your heat tool and dry it or you could wait for it to dry. Then take your ink pad and drag on it. I used 3 colors Chocolate, Sunny Yellow and Topiary (all CTMH). The dog was colored with markers of the same color except the light brown is Desert Sand. He is hand cut out and placed on the Sunny Yellow cardstock. The saying is from a $1 stamp set I bought and says "I can't take my eyes off of you". Up in the corner are some dog bone brads I've had hidden away. The background the distressed piece is on is Topiery. I think it turned out pretty cute.


Until the next post keep warm, it's right chilly here, in the 20's. Real frost on the pumpkins, and makes the apples sweeter.

Hugs,

Bobbi

Monday, October 24, 2011

Card #2

Good morning all, chilly and clear here. I think fall is in full bloom. All our trees are a beautiful gold. The wind has been blowing a few off, not enough to crank up the lawn mower and pick them up. Maybe by the end of the week I'll make a pass. We have blown out all the sprinkler lines, still need to winterize the 5th wheel (spare bedroom).


The card I'm sharing today is a fun one. There are so many things you can do with a clown. This one is very cute. I colored him with markers and a white pen for the face, as I can't get my white markers to work, they seem to dry out really fast. I then hand cut him out. The technique I chose for a back ground is from Technique Junkies. It takes some time to do it but has a great effect. You can't get the full view of it on the finished card. Here's what you do. Use a 1 inch circle punch and 4 pieces of paper. You could use your scrap up with this technique. You can use either cardstock or designer paper. Anyway start punching out circles. Not sure how many, but a bunch. Next you'll need 2 sided sticky paper or glue/glue stick. I prefer glue. Start laying the circles on your card front. Be sure to overlap them. Cover the whole piece of paper, don't let your background show. I did it on my card front. Guess I should back up and let you know, I did the background before I ever got the image. So I colored the image to match my background.


Sorry, the card has shiny spots, it's in a clear envelope. Anyway, here goes. The purple and pink are the same as the circles in the background. The two techniques are called collaged circles and out of the box. Out of box is when the image is off the layered part. The balloons are attached to dental floss. It was fun to make and I think rather cute.


Until tomorrow, enjoy your day.

Hugs,

Bobbi


Sunday, October 23, 2011

New Share

It's been so long, I almost forgot how to post. My life is crazy of an old person. I don't remember being this busy when I was raising my kids. Maybe the days are just getting shorter. I know I'm getting slower (maybe that's lazyer).


Anyway here goes, I'm in another swap called "your choice". It's where you stamp an image and send it to the hostess, actually I did 12, so I'll get 6 full cards back. What I'm going to share are the images sent to me and the cards I made. First I'll show the black and white image then what I did. Some of the techniques on my cards are from technique swaps. I'll share how as I go.

The first one was hard... I couldn't tell for sure what the different streamers were. It hard to tell the hair from the backgound. What I did was email the hostess and she scanned hers and sent it to me. I zoomed in on different parts of the image to see what it was, it worked great, kind of like using a magnifing glass. I should have thought of that to begin with. I have a bunch of really neat backgrounds that I need to use so I can make more, so found a couple I thought might go good with this. The one I picked is called Pearl-Ex. This is what you need to make it: Elmer's glue, stipple brush, two or three colors of Pearl-Ex (Polished Pearls or Perfect Pearls), a heat gun and cardstock (dark color). Directions: Put small blobs of glue on the cardstock. Stipple the glue all over the cardstock. Sprinkle small amoungts of one color of Pearl-Ex around the card. Repeat with other colors one at a time. Stipple the powder around in the glue, blending some of the colors and leaving some pure (white). Heat with heat gun to dry glue. (This will make interesting bubbles), Wash stipple brush in warm soapy water before glue dries. (Stipple means to softly pounce the brush. Hope this is clear as mud. If not come by and we'll play. It really is pretty when it's done. Thank you Lorian for the tutorial.


Now for the main event, The Card. All the coloring was done with colored pencil. The very back layer is Moonstuck cardstock by CTMH. The next is a shiny cardstock from my stash. (Which I've had for years). Then comes the Pearl-Ex background paper. It really sparkles. The dresses are done in gray and seem to shine in the card. The dark haired girl looked like she was carrying paint bushes so that's how I colored it. The blonde had flowers. Wasn't sure what the hanging things were so made one vines and one ribbons. Used the purple brads as the embellishment because nothing else really went with it.


Well, this is one of the things that's been keeping me busy, the other is school. Almost through our first quarter. It's been a strange start, like the kids are in full moon all the time. Have 19 kindergarteners this year so that's been a real eye opener.


You all have a wonderful Sunday. Will try and be back tomorrow with another card, have 5 more.

Hugs,

Bobbi

Sunday, August 7, 2011

The missing has been found

Seems like it's been forever since I posted. Life pretty much got in the way. We lost my brother in March. Since then things have been crazy. School got out for me the first part of May, then the work really began, getting stuff ready for our closing the books on the year. In June I went to a fun workshop in Ellensburg with my boss and another gal. Wow! Did I learn alot. It's not easy to cram alot in an older brain. The end of June and the first week of July we spent at my brothers in Nevada, just relaxing and having fun. Then Summer School started. We ended on Friday. In between all this I have been making cards off and on.

I'm going to share one I made for a Christmas in July. The background is Outdoor Denim with the strip paper layered on. The bottom layer is done by wetting the Bamboo Cardstock and rolling in a ball, then flatting out and letting dry. You need to make it a little bigger than you need because of the wrinkles. I then took the Bamboo ink pad and brushed it across the top of the paper (this is one type of destressing). The ribbon is wrapped around the striped paper. The image is retired (Madonna) it's stamped with the Bamboo ink on Bamboo paper.

The new Idea Book is out. Only 15 of the 60 colors of cardstock come in 24 sheets. The prices went up to $14.50 for all colors but White Daisy and Colonial White which is $9.50. The good news is the stamp prices went down. You need to get a book to see the changes. So call me or email me for one. Free with $25 order or $2.

This is it for now. Hope you like the card. Have a grand day.
Hugs,
Bobbi

Monday, April 25, 2011

Another Small Book

This little book's cover is made of tooled leather. It's recycled from a purse or wallet. The front and back both has a big colorful Butterfly. That is the theme of the pages. This book was from Anita. I'll be going down on these as that's how I layed them out to scan. The nex is a butterfly on a flower stem. It's been colored with colored pencils. This was done by Robin. The next is kind of hard to see. There are blue/green butterflys stamped then a raised butterfly in glass stuck on it, this was done by Karla. These are only about 3 inches X 3 inches.
Now to the images on the left. The first is stamped in black then covered with ink and clear embossing. It looks blue but is more green with gold in it, this was done by Rebecca. The next one is on a light yellow paper. It has scrolls stamped in a rust color and brown. Then a orange butterfly is stamped over two of the brown scrolls. This was done by Sandy. The next is done on pink rose paper. It's stamped and embossed in black. The inside of the wings are colored with marker, the artist is Susan. The last is a Oriental butterfly. It looks like it could be a dancer with arms and legs spread as if jumping. It's stamped in black and colored with colored pencils. It was done by Barbara.
This was a fun book to receive. I love the was each person did their own thing, making for a beautiful finished piece.
Come back again.
Hugs,
Bobbi

Saturday, April 23, 2011

Little Book - Geometrics

I said I'd share some of my little books that have been coming in. This book was started by Robin. In real life these are about 2" X 4". The title of the book is Geometrics. This meaning everything in the book must have some geometrics in them. The first one is done on a multi colored green. It was done in Black embossing and says "Woman in Stripes". This was done by Susan. You can't really see it but the lines in the dress go in different directions. Next is a large catci with a lizard on top of it. The background covers the geometics. This was by Sandy. The 3rd is a material with the cats on it. The back is stamped with cats and cat faces with diamonds. This was done by Karla. The little robot guys is done in paper pieces with google eyes. The bottom is stamped with small flowers and grass. This was done by Jackie. The next is circles with flowers in the center. The top circle says "dream", this was done by Avis. The last is done on glossy paper with multi color ink. It's really cool and has letters, flowers, eyes and a cat at the bottom. The artist is Mary.

The way this works is a person makes the book and selects the theme. Then each person stamps something to do with that theme. Sometimes we don't have stamps to go with certain themes so you have to get a little creative as Jackie did. You will see more of how creative these artist can get when I share some more little books.

I have finished my D swap yet, but will share when I get them finished. Until next time.
Hugs.
Bobbi

Tuesday, April 19, 2011

Correct Spelling of Millefiori

Boy! Do I feel stupid, should have looked up the correct spelling. If I have doubts next time I will. On to the next share. Here are 2 more cards using this technique. I got the technique for the Technique Junkies newsletter, you can find the info online.


This card was made by Judi. The base is a Sunflower Yellow cardstock. My background was then attached. The flower was gold embossed on red twice and cut out. The bottom part is on flat and the next part of the flower is on a raised dot. The brad is put on with a glue dot. The Happy Birthday is stamped on white and edged with the Sunflower. I think this card is super cute, just seems to match everything. Wish I had a flower stamp like this one. May have to get out of my box and try it with the flower in the background.


The next card was on the home page of Midwest Stampers. I love the saying. The card was made by H. Hulse. It's really very simple, but looks very elegant. The base of the card is Red as you can see. The background was cut apart and layed sideways on the card, then layered with black. The background was then put on the back and the saying stamped on white. I really hope you can read the saying. It was written by Dontay Hall, age 8. It really makes alot of sense. The inside of the card has a layered white piece, she punched flowers out of the background paper and added them to the bottom, and a larger one at the top. Very neat card, sometimes you just have to visualize how you want something to look.

I love how all 4 of these ladies took the same piece of paper and did something totally different with it. My challenge to you is to try this and let me know what you come up with. You'll be surprised.

Hugs,

Bobbi

Monday, April 18, 2011

Millifoil Background Swap

These cards are from a swap I was in recently. It was a background swap, where someone else used your back ground and made a card for you. My background was called "Millifoil with a twist". The original "Millifoil" is done with circles. I don't own a circle stamp so I used my little square. The colors I used were Cranberry, Goldrush, Sunflower and Black, all CTMH. I made a full sheet of random stamped 8 1/2 X 11 white by Walmart. Cut in quarters, this makes the front of a card (4 1/4 X 5 1/2).

This cards base is done on a sparkly red, then my background. On top of it is a sparkly yellow, then the stamped image. I don't know who this stamp is by, sorry. It's colored with colored pencils with the yellow glitter flower with red jewel. I forgot the edges of the stamped image is cut with decorator scissors. This card was made by Paula P.

The next card is the other direction. It's base paper is red with glitter imbedded in it. The corners of the "Millifoil" arem rounded. There a 4 layer to the stamp image. Red angled, white, then red done with the stamp edges, just like the stamp. I'm not sure if this is a stamp or stamped. It has the postoffice cancelation on it, the word on it says, "Shqiperia", also the 20 has a q behind it. The inside says "The Road to a Friend's House is Never Long!". The card was made by Grandma Linda.

I love these cards. I have 2 more to share later. These show the different types of cards you can make with the same backgrounds. Love the variety you get.

Thanks for stopping come back again.

Hugs,

Bobbi

Friday, April 15, 2011

Letter C

I tried this the other day and it wouldn't let me put a picture in. So today I'm trying again. This card was done fast. I was late getting my swap out. My sister picked the colors and the flower stamps. Everything is CTMH. The back ground is from TJ Junkies and called Millfoil. It is suppose to be done with circles and small black flowers ( I'll one kinda like it's suppose to be later). For the letter C, I could have used cat, cookie, cook but I took the easy way and used cupcakes.

I must say the colors are way out of the box for me. The squares are stamped in Juniper and Twilight. The large flower is stamped in Honey and the small flower in Sunset. The stamp sets are all retired. The cupcakes are colored with Petal (the light) and Gypsy (dark). The red you see is Tulip. The scalloped paper is Sunset and the ribbon Honey. The next time you make a card use different colors than you normally would. Try working outside your box, you never know you may end up loving the color combo's you pick.


My next share will be a background swap I was in. This will really give you something to think about. One of the cards I'll show is on the Midwest Stamps page on Yahoo this week. Take a peek and come back and see what I have to say about it.

Till then happy stamping or whatever crafty thing your doing. Thanks for stopping. Till next time.

Hugs,

Bobbi

Monday, April 4, 2011

Letter B

Hi again,
Today is the B day. The background for this card is called "distressed ink". You take the ink pads and drag them across the paper. The little bear is stamped on cork, cut out and layed on New England Ivy cardstock. The stamps and inks used are CTMH, the white background is from Walmart. The ribbon is from my stash. This was a fun, easy card to make. Sometimes it helps if you don't think to much.


I haven't quite got my C card put together. The swap was mailed but I always make an extra card for me. I have boxes of cards I'm finding. Spent most of the day trying to organize my space. Now if you saw it you'd laugh. Someday I'll post a picture, but I must warn you there is no paint on the walls only plaster board. I had to move everything out to do that and said I'd paint around it when the time came. Guess what the time hasn't come yet. It will one of these days.


I was down at my sister-in-laws when my brother was sick. She's addicted like I am to stamping and scrapping. I really thought I had a lot of stuff, but she beats me all to heck. She has the big Cricut, which I don't have, not even the small one. Then she has all these folders for the Big Shot and Cuttlebug. I have a drawer full but she has a big box, and I mean big. Guess I don't need to buy when I can borrow. My other sister-in-law and daughter-in-law were with me. They couldn't believe how much fun we could have at her house. So it's been decided when they all come back for a visit we're doing an all nighter at her house. No little kids, just us big kids. Hopefully that'll happen on Mother's Day weekend, but we'll have to wait and see.


Thanks for stopping by, come back again.

Hugs,

Bobbi

Sunday, April 3, 2011

The start of the Alphabet Swap

I have joined an Alphabet swap. Each card must have something stamped on the front starting with the letter. Today's is A. Now think of the things that start with A. Of course if you live in North Central Washington the first thing that comes to mind is Apples. There used to be one right behind it, until they pulled it for houses. Now it's just a field. Off tract again. The card for today is an apple. The base is white, layered with Olive, then Chocolate cardstock. The words "Garden of Delight" are embossed with Olive embossing powder. The image was colored with markers. The mulberry paper is from my stash. All the other products are from Close to My Heart.


I've tried to upload the newest Idea Book on my page but for some reason it won't upload. If you like one let me know. They are now coming out with on 2 a year. The next one will come out in July with Summer, Fall and Winter stamps. All the items will stay on sale until the end of the year.


Since I'm on vacation this week and home, I'll try and get the B and C uploaded. I'm starting my work on D now. I also have some small books to upload, these are real cool.

Until then take care and thanks for stopping by.

Hugs,

Bobbi

Wednesday, March 30, 2011

1st Post of the Year

What can I say, it's been a while. Life has been busy and has taken alot out of my family. If you know me, it's always been family first. This past year has been a very hard one for everyone. I told you earlier, my brother had cancer. On the morning, March 24, he join our Lord in Heaven. He fought a real battle with cancer, but once again as all others, lost. My belief is we are put here for a reason and when we've met it we move on. We found at Bill's Celebration of Life, he touched many people in many ways. Of the 4 of us kids, he was the one that was quiet and layed back. He wasn't quiet when he was mad and had a temper but compared to the rest of he was pretty quiet. He loved to fish and do woodworking. He had the hands of someone out in the sun. He wasn't always a successful fisherman but would share if you'd clean them, which I always made him do when he gave me fish. I don't know how to clean and refuse to learn, thus I don't fish. Rule is you catch them, you clean them. He was always con-able (not sure that's a word). So he always cleaned my fish, besides I was the oldest and you don't argue with big sister. I'll miss calling him and him saying is this "My Butt head sister". As for his woodworking he made some wonderful things. I have a roll top desk in my living room that has to stay here as we can't get it out of the door and it's very heavy. So it'll always be my reminder. He made a beautiful hutch for his wife last year. We were very proud of the work he did. I'm going to miss him so much. We alway got a good laugh from him cause he was a yard sale nut. He bought things that were pure junk saying he could fix it. I can't remember how many cars he fixed for his grandson, so he could drive them around the yard. You know the kid type cars with the batteries. All the nieces and nephews had a good time going to his house to see what contrap he jury rigged. Oh! Billy Boy, your going to missed by us all. May you rest in peace without pain. We love you. My next post will be back to cards, this was something I had to do for me to get closure. I will miss him alot. Hugs, Bobbi